Some 3d stuff:
If you see the picture below, the top surface of the cube has a mirrored texture along the XZ axis. Not cool!
In order to avoid this, we need to specify new vertices for each orientation of the texture, per point. Not too bad.
Then I created my second "Basic" class, one that I think I'll use a bit more of thean the "Tube" class. It's another data structure again, believe it or not, acting as a simple matrix. I call it a SuperMatrix because it allows be to have a larger than 4x4 matrix, which the actual "Matrix" class provides. Downside? Well, we can only store type Ints. But hey, ints go a long way nowadays!
Say we have a map, like this:
{ 1,1,1,1,1
1,0,1,0,1
1,1,1,1,1
1,0,1,0,1
1,1,1,1,1 }
Where ones represent floor tiles and 0's represent empty gaps in space. We can load this 5x5 data into our supermatrix (Doesn't have to be a "square" matrix by the way!) and then create a "Floor" tile for each section of the map. The floor tile consists of two triangles, oriented flat along the Z axis, with length and width provided by the constructor. (That means our tiles can be rectangular as well!) After writing up the code, here's the result:

(Note: You can right click -> View image to see full sized images hosted on this website)
And look at that, the exact pattern we outlined in ones and zeroes. The key here is: You see where I'm going with this? Instead of having pre-defined maps in code, we bring them out of code and into XML. Then we've got 3D XML floormaps. Add autogenerating code for walls, and write a generic 3D object drawing method and create a collection of objects to be drawn, each with their own textures, positions, lighting styles, etc, and we've almost got what looks to be a game.
Vacations coming up, so I may not have too many posts until after then. (Happy thanksgiving!)
-Posted 11/16/2011 @ 3:48pm.
PS: How is Skyrim? Didn't buy it yet.
Day three: Textured!:
Today I started right off the bat with getting rid of the heightmap data and introduced simple vector3 data into my vertices to define a 3D shape. Using a bit of drawing in MSPaint, I defined the vertices of a cube with vector3 data and redefined the indices of the triangle to match my own data. I ran that with colored vertices and voila, a cube. But what good is 3D in games without textures?
After fiddling a bit with setting up texture vector2's relative to vertices of the cube, I was able to produce the following:

By defining vertices and indices in this manner, we can easily draw multiple shapes on the screen. However, we don't currently have an easy way to map vertices to texture coordinates, so that's probably going to be next up on the chopping block. We've also got no easy way to create new 3D objects other than manually entering coordinates either, so we'll have to implement something along those lines shortly after.
To get an idea of what I'm doing to draw stuff on screen, take a look at my crude MSPaint reference I drew:

So in order to really draw something textured in 3D, we have to map a coordinate of our face texture to our Vector3's. Just taking a faint guess at what we could do, is sort of combine this relationship with the heightmap data we obtained earlier, to automatically draw 3D shapes from a texture! I'll get more into details when I actually implement it, but for now I have class.
Posted at 9:41am on 11/14/2011. Almost turkeytime!
Not too important updates:
I began working a bit more on the camera functionality today, mostly just in terms of trying to begin managing looking at stuff I actually want to look at. So far I have created a simple method which sets the camera focus on a particular vector in 3d space.
We can grab mouse coordinates just as easily as we get xbox controller data or keyboard keypresses. Since this is on PC, the keys could easily be user-defined, as well as adjusting mouse sensitivity, inverted aim, etc.
I took an exam today and though I'm pretty confident that I scored well, I am very tired as a result. Tuesdays and thursdays are full of math courses for me, and I'm usually spent after a long day of doing math homework, attending math lectures, etc.
No really cool screenshots at the moment to show, everything still looks the same, just from different angles and such. Next up is either beginning to create my own 3D shapes, or texturing the one I already have. It's really going to depend on if I plan on using a modeling program, and how I plan on implementing that in C#.
Day two of 3D
Today I did the next step and translated positional height data into a color value. On the given example, I thought it was cool how they used brown, green, and blue, which made the scene appear to be lifelike. Instead, I chose to augment everything in terms of a color, defined as
Color(red, green, blue) where we make 2/3 of those variables zero and make the third a ratio between it and the maximum height, multiplied by 255. This produced the following result:

Then I added some bits that allows the camera to both move in 3D space, and rotate. We can pan across, zoom in and out of, and rotate around whatever heightmap we load in place. I opted out of including "roll" for the moment though, as I honestly dont see a use for it at the moment.
We're closer to a texture than before, but I think this is going to say a big deal about bump mapping, simple shading and texturing. I'm also looking into using 3D models that aren't based on heightmaps but rather some custom model file, probably written in XNA. Who knows, maybe this'll just end up being me writing a custom 3D modeling program. Oh well.
-Posted 11/9/2011 @ 4:58pm.
Ooh! 3D and three-dimensional!:
So I've begun working on a new project involving most of the stuff I am currently studying in school: Matrices, 2D and 3D vector spaces, and more.
Right off the bat for some reason, I wanted to develop an engine behind game using this stuff. This led me to learning more about translating vectors in 3d space into 2d imaging, thus beginning me down the road of dealing with 3D in C#.
My first triangle! It took a little while, but eventually I got the positions for points in 3d space, and drew a triangle connecting the points. From there, it was only a trivial task to create a number of linked triangles forming a mesh based on a color depth image.
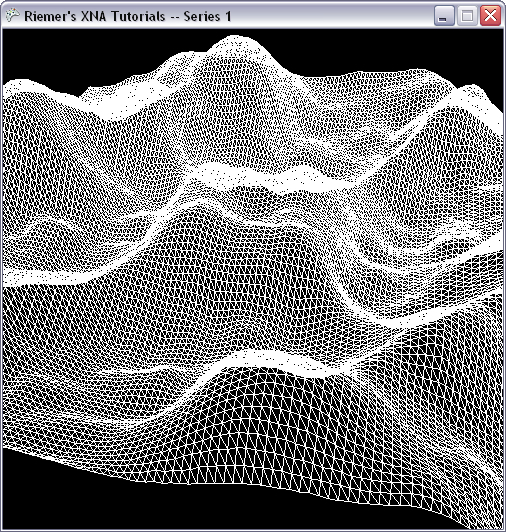
Photo from: http://www.riemers.net/eng/Tutorials/XNA/Csharp/Series1/Keyboard.php
Above is the sample code and height map test provided at Riemer's XNA tutorials. In my example, I chose it to compare the image using a different scale and color, but it appears about the same.
But what does following some 3D tutorial have to do with anything? Is this engine going to be 3D?
The answer to that question is unknown, though likely not. The idea behind the excercise was trying to develop a system in which to display 3d coordinates on the screen. Next up will be texturing, and then finally I'll try giving a good example of how it all relates to a game.
Posted 11/8/2011 @ 2:31pm